Gesture detector

ยท 2 min read
Feodor Fitsner
Flet founder and developer

We've just released Flet 0.1.62 with support of gestures processing!

There is a new control - GestureDetector which allows handling all sorts of gestures: single and double taps with a left (primary) and right (secondary) mouse (pointer) buttons, vertical, horizontal and bi-directional drags, zoom (pinch-in and pinch-out) gestures as well as hover events. Now, by wrapping it into GestureDetector, you can make any Flet control "clickable" and "draggable"!

Here is a simple example of an app which allows you to drag containers inside a Stack:

import flet as ft

def main(page: ft.Page):
def on_pan_update(e: ft.DragUpdateEvent):
e.control.top = max(0, e.control.top + e.delta_y)
e.control.left = max(0, e.control.left + e.delta_x)
e.control.update()

gd = ft.GestureDetector(
mouse_cursor=ft.MouseCursor.MOVE,
on_vertical_drag_update=on_pan_update,
left=100,
top=100,
content=ft.Container(bgcolor=ft.colors.BLUE, width=50, height=50, border_radius=5),
)

page.add( ft.Stack([gd], expand=True))

ft.app(target=main)

Gesture detector is yet another great addition to a collection of Flet primitives that allows you to build apps limited only by your imagination. 2D drawing coming later this month is going to complete that ensemble!

That release wasn't about only gestures though - that was a "stabilization" release too. We fixed a number of bugs and added a bunch of other small features which you can see here.

Upgrade Flet module to the latest version (pip install flet --upgrade), integrate auth in your app and let us know what you think!

Enjoy!

User authentication

ยท 3 min read
Feodor Fitsner
Flet founder and developer

User authentication in Flet is here! ๐ŸŽ‰

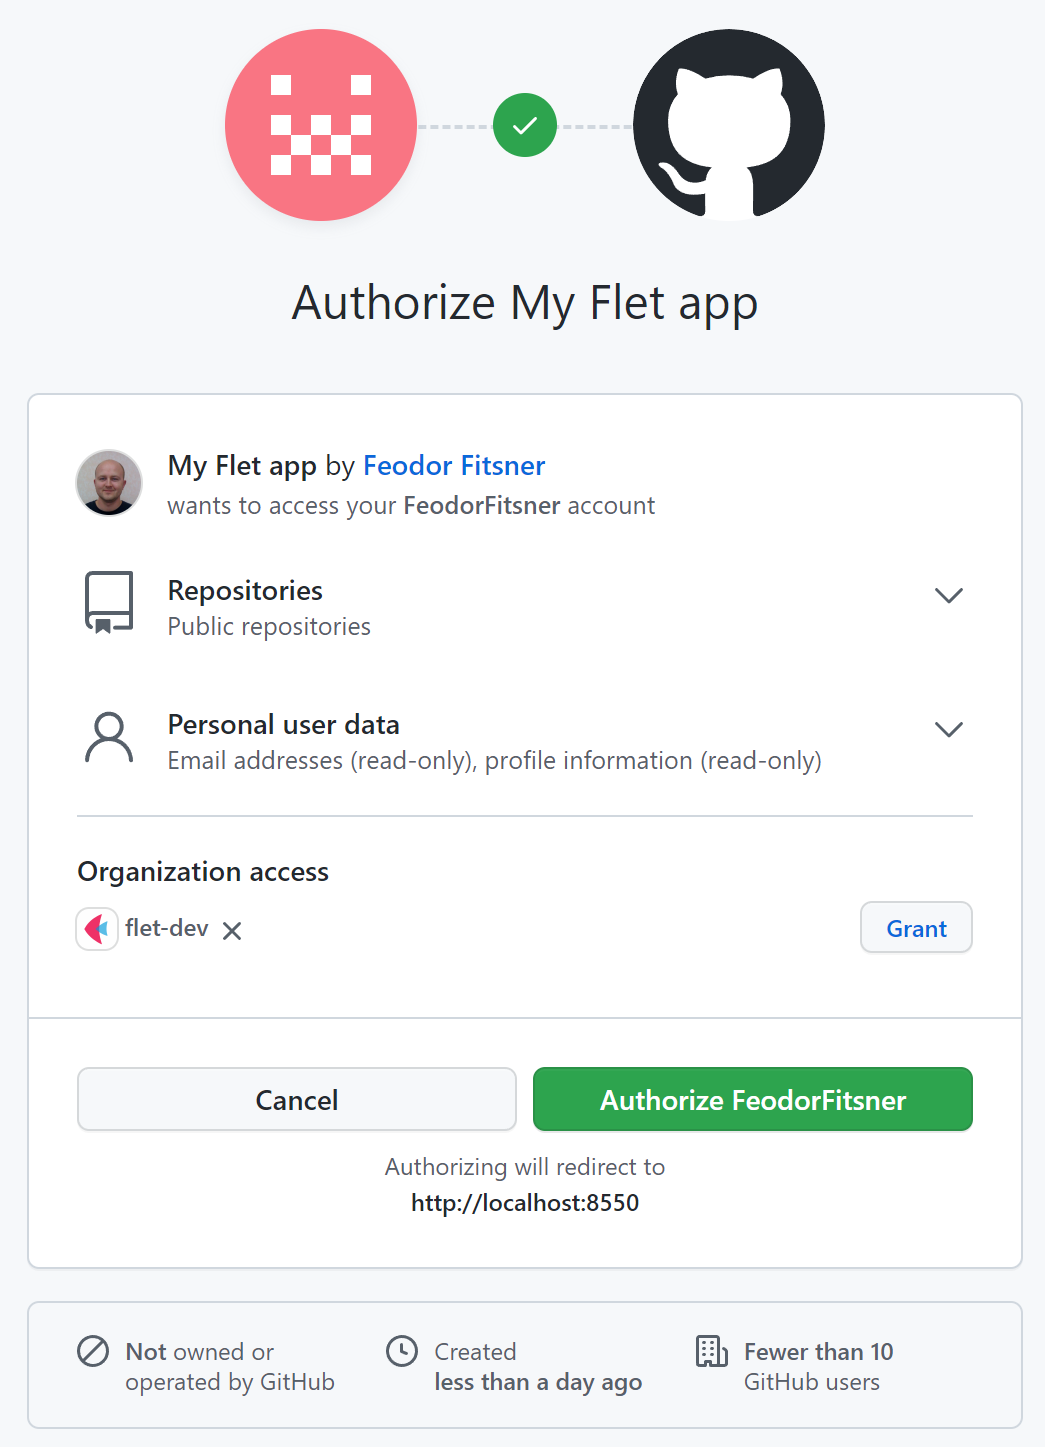
Now you can implement user authentication ("Login with X" buttons) in your Flet app using 3rd-party identity providers such as GitHub, Google, Azure, Auth0, LinkedIn and others:

Traditionally, this release is not just about authentication, but it adds a ton of accompanying functionality and small improvements:

Authenticationโ€‹

Flet authentication features:

  • Works with Flet desktop, web and mobile apps.
  • Using multiple authentication providers in one app.
  • Built-in OAuth providers with automatic user details fetching:
    • GitHub
    • Azure
    • Google
    • Auth0
  • Optional groups fetching.
  • Automatic token refresh.
  • Login with a saved token ("Remember me").
  • Custom OAuth providers.

A simple example on how to add "Login with GitHub" button to your Flet app:

import os

import flet as ft
from flet.auth.providers.github_oauth_provider import GitHubOAuthProvider

def main(page: ft.Page):

provider = GitHubOAuthProvider(
client_id=os.getenv("GITHUB_CLIENT_ID"),
client_secret=os.getenv("GITHUB_CLIENT_SECRET"),
redirect_url="http://localhost:8550/api/oauth/redirect",
)

def login_click(e):
page.login(provider)

def on_login(e):
print("Access token:", page.auth.token.access_token)
print("User ID:", page.auth.user.id)

page.on_login = on_login
page.add(ft.ElevatedButton("Login with GitHub", on_click=login_click))

ft.app(target=main, port=8550, view=ft.AppView.WEB_BROWSER)
note

Before running the app set the secret environment variables in a command line:

$ export GITHUB_CLIENT_ID="<client_id>"
$ export GITHUB_CLIENT_SECRET="<client_secret>"

Read Authentication guide for more information and examples.

Client storageโ€‹

Flet's client storage API that allows storing key-value data on a client side in a persistent storage. Flet implementation uses shared_preferences Flutter package.

Writing data to the storage:

page.client_storage.set("key", "value")

Reading data:

value = page.client_storage.get("key")

Read Client storage guide for more information and examples.

Session storageโ€‹

Flet introduces an API for storing key-value data in user's session on a server side.

Writing data to the session:

page.session.set("key", "value")

Reading data:

value = page.session.get("key")

Read Session storage guide for more information and examples

Encryption APIโ€‹

In this release Flet introduces utility methods to encrypt and decrypt sensitive text data using symmetric algorithm (where the same key is used for encryption and decryption). It uses Fernet implementation from cryptography package, which is AES 128 with some additional hardening, plus PBKDF2 to derive encryption key from a user passphrase.

Encrypting data:

from flet.security import encrypt, decrypt
secret_key = "S3CreT!"
plain_text = "This is a secret message!"
encrypted_data = encrypt(plain_text, secret_key)

Decrypting data:

from flet.security import encrypt, decrypt
secret_key = "S3CreT!"
plain_text = decrypt(encrypted_data, secret_key)
print(plain_text)

Continue reading for more information and examples.

Other improvementsโ€‹

import flet as ft
def main(page: ft.Page):
page.window_bgcolor = ft.colors.TRANSPARENT
page.bgcolor=ft.colors.TRANSPARENT
page.window_title_bar_hidden = True
page.window_frameless = True
page.window_left = 400
page.window_top = 400
page.add(ft.ElevatedButton("I'm a floating button!"))
ft.app(target=main)
  • page.get_clipboard()
  • page.launch_url() - better control with additional arguments:
    • web_window_name - window tab/name to open URL in: _self - the same tab, _blank - a new tab or <your name> - a named tab.
    • web_popup_window - set to True to display a URL in a browser popup window. Default is False.
    • window_width - optional, popup window width.
    • window_height - optional, popup window height.
  • page.window_to_front()
  • page.close_in_app_web_view()

Upgrade Flet module to the latest version (pip install flet --upgrade), integrate auth in your app and let us know what you think!

Enjoy!

File picker and uploads

ยท 4 min read
Feodor Fitsner
Flet founder and developer

Finally, File picker with uploads has arrived! ๐ŸŽ‰

File picker control opens a native OS dialog for selecting files and directories. It's based on a fantastic file_picker Flutter package.

It works on all platforms: Web, macOS, Window, Linux, iOS and Android.
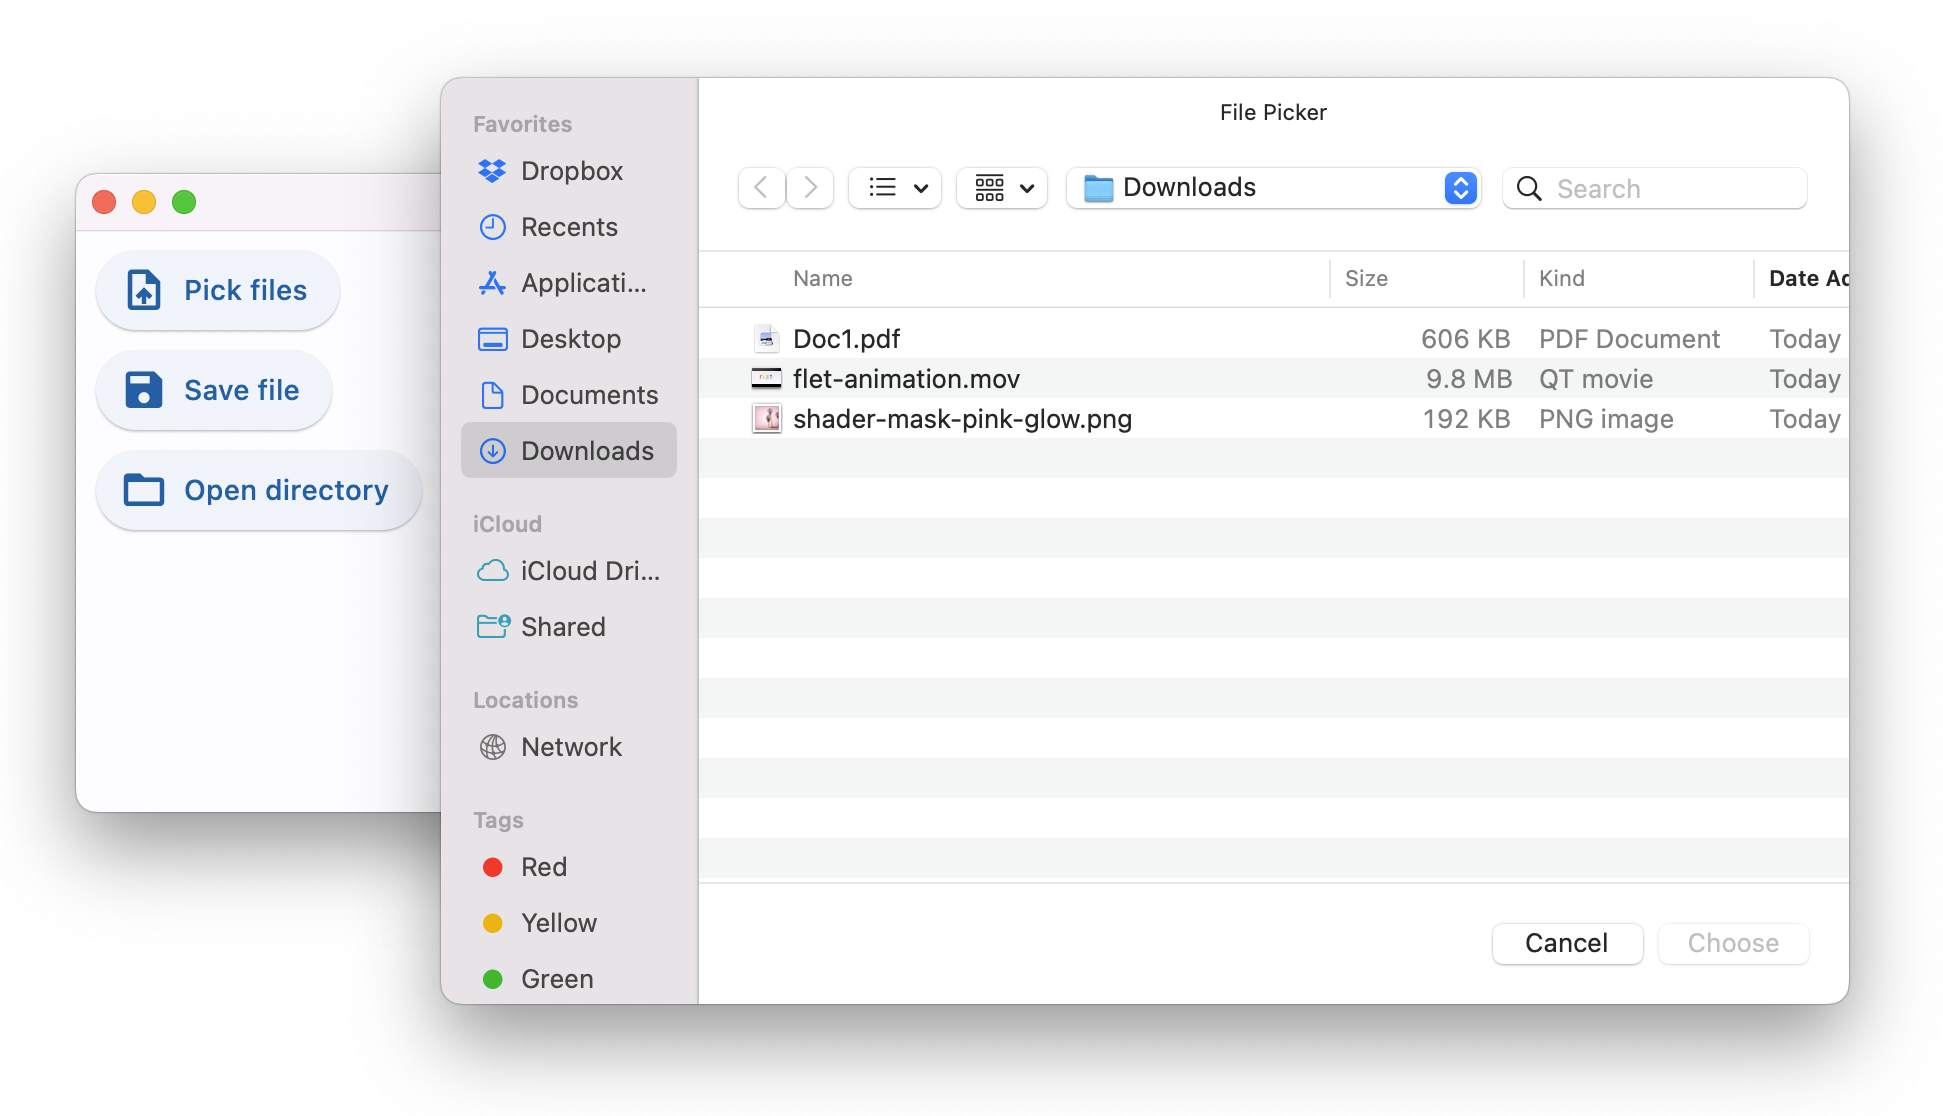
Check out source code of the demo above.

File picker allows opening three dialogs:

  • Pick files - one or multiple, any files or only specific types.
  • Save file - choose directory and file name.
  • Get directory - select directory.

When running Flet app in a browser only "Pick files" option is available and it's used for uploads only as it, obviously, doesn't return a full path to a selected file.

Where file picker really shines is a desktop! All three dialogs return full paths to selected files and directories - great assistance to your users!

Using file picker in your appโ€‹

It is recommended to add file picker to page.overlay.controls collection, so it doesn't affect the layout of your app. Despite file picker has 0x0 size it is still considered as a control when put into Row or Column.

import flet as ft

file_picker = ft.FilePicker()
page.overlay.append(file_picker)
page.update()

To open file picker dialog call one of the three methods:

  • pick_files()
  • save_file()
  • get_directory_path()

Lambda works pretty nice for that:

ft.ElevatedButton("Choose files...",
on_click=lambda _: file_picker.pick_files(allow_multiple=True))

When dialog is closed FilePicker.on_result event handler is called which event object has one of the following properties set:

  • files - "Pick files" dialog only, a list of selected files or None if dialog was cancelled.
  • path - "Save file" and "Get directory" dialogs, a full path to a file or directory or None if dialog was cancelled.
import flet as ft

def on_dialog_result(e: ft.FilePickerResultEvent):
print("Selected files:", e.files)
print("Selected file or directory:", e.path)

file_picker = ft.FilePicker(on_result=on_dialog_result)

The last result is always available in FilePicker.result property.

Check File picker control docs for all available dialog methods and their parameters.

Uploading filesโ€‹

File picker has built-in upload capabilities that work on all platforms and the web.

To upload one or more files you should call FilePicker.pick_files() first. When the files are selected by the user they are not automatically uploaded anywhere, but instead their references are kept in the file picker state.

To perform an actual upload you should call FilePicker.upload() method and pass the list of files that need to be uploaded along with their upload URLs and upload method (PUT or POST):

import flet as ft

def upload_files(e):
upload_list = []
if file_picker.result != None and file_picker.result.files != None:
for f in file_picker.result.files:
upload_list.append(
FilePickerUploadFile(
f.name,
upload_url=page.get_upload_url(f.name, 600),
)
)
file_picker.upload(upload_list)

ft.ElevatedButton("Upload", on_click=upload_files)
note

If you need to separate uploads for each user you can specify a filename prepended with any number of directories in page.get_upload_url() call, for example:

upload_url = page.get_upload_url(f"/{username}/pictures/{f.name}", 600)

/{username}/pictures directories will be automatically created inside upload_dir if not exist.

Upload storageโ€‹

Notice the usage of page.get_upload_url() method - it generates a presigned upload URL for Flet's internal upload storage.

Use any storage for file uploads

You can generate presigned upload URL for AWS S3 storage using boto3 library.

The same technique should work for Wasabi, Backblaze, MinIO and any other storage providers with S3-compatible API.

To enable Flet saving uploaded files to a directory provide full or relative path to that directory in flet.app() call:

ft.app(target=main, upload_dir="uploads")

You can even put uploads inside "assets" directory, so uploaded files, e.g. pictures, docs or other media, can be accessed from a Flet client right away:

ft.app(target=main, assets_dir="assets", upload_dir="assets/uploads")

and somewhere in your app you can display uploaded picture with:

page.add(ft.Image(src="/uploads/<some-uploaded-picture.png>"))

Upload progressโ€‹

Once FilePicker.upload() method is called Flet client asynchronously starts uploading selected files one-by-one and reports the progress via FilePicker.on_upload callback.

Event object of on_upload event is an instance of FilePickerUploadEvent class with the following fields:

  • file_name
  • progress - a value from 0.0 to 1.0.
  • error

The callback is called at least twice for every uploaded file: with 0 progress before upload begins and with 1.0 progress when upload is finished. For files larger than 1 MB a progress is additionally reported for every 10% uploaded.

Check that example demonstrating multiple file uploads:
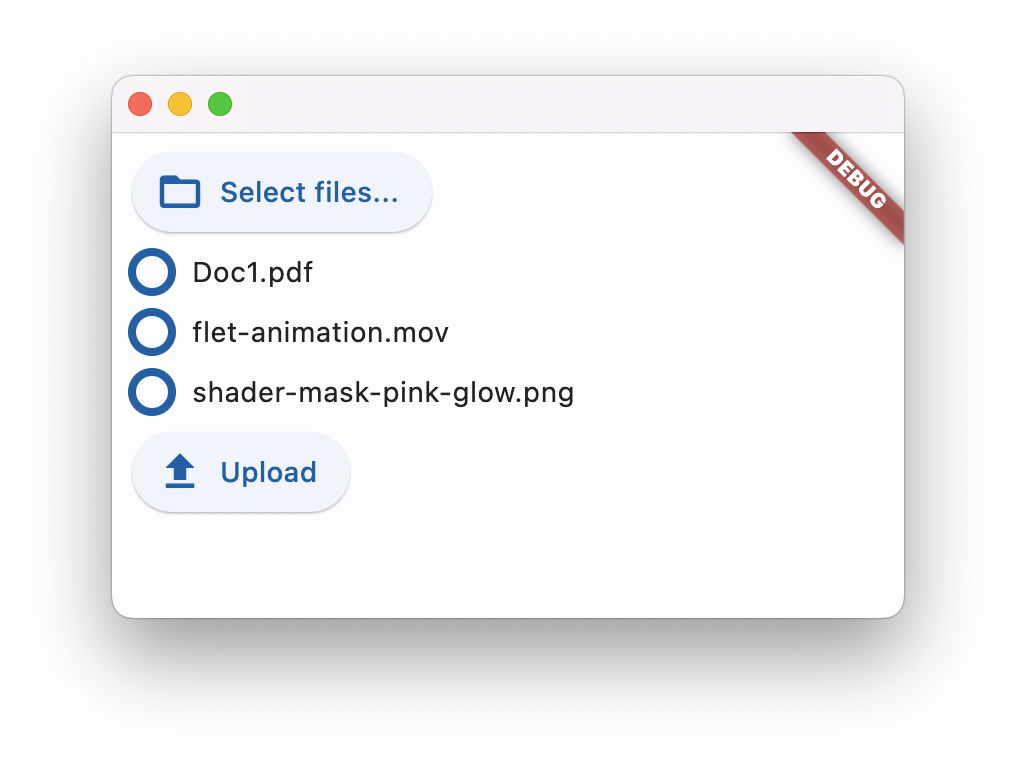
See File picker control docs for all its properties and examples.

Upgrade Flet module to the latest version (pip install flet --upgrade), give File Picker a try and let us know what you think!

Enjoy!

Fun with animations

ยท 2 min read
Feodor Fitsner
Flet founder and developer

Despite Flet release debuting animations support was released some time ago, we've just finished documenting its new features! We all know if the feature is not documented it just doesn't exist! ๐Ÿ˜‰

Flutter offers multiple approaches for creating animations such "implicit", "explicit", "tween", "stagered", "pre-canned" animations as well as displaying animation scenes prepared in Rive and Lottie editors.

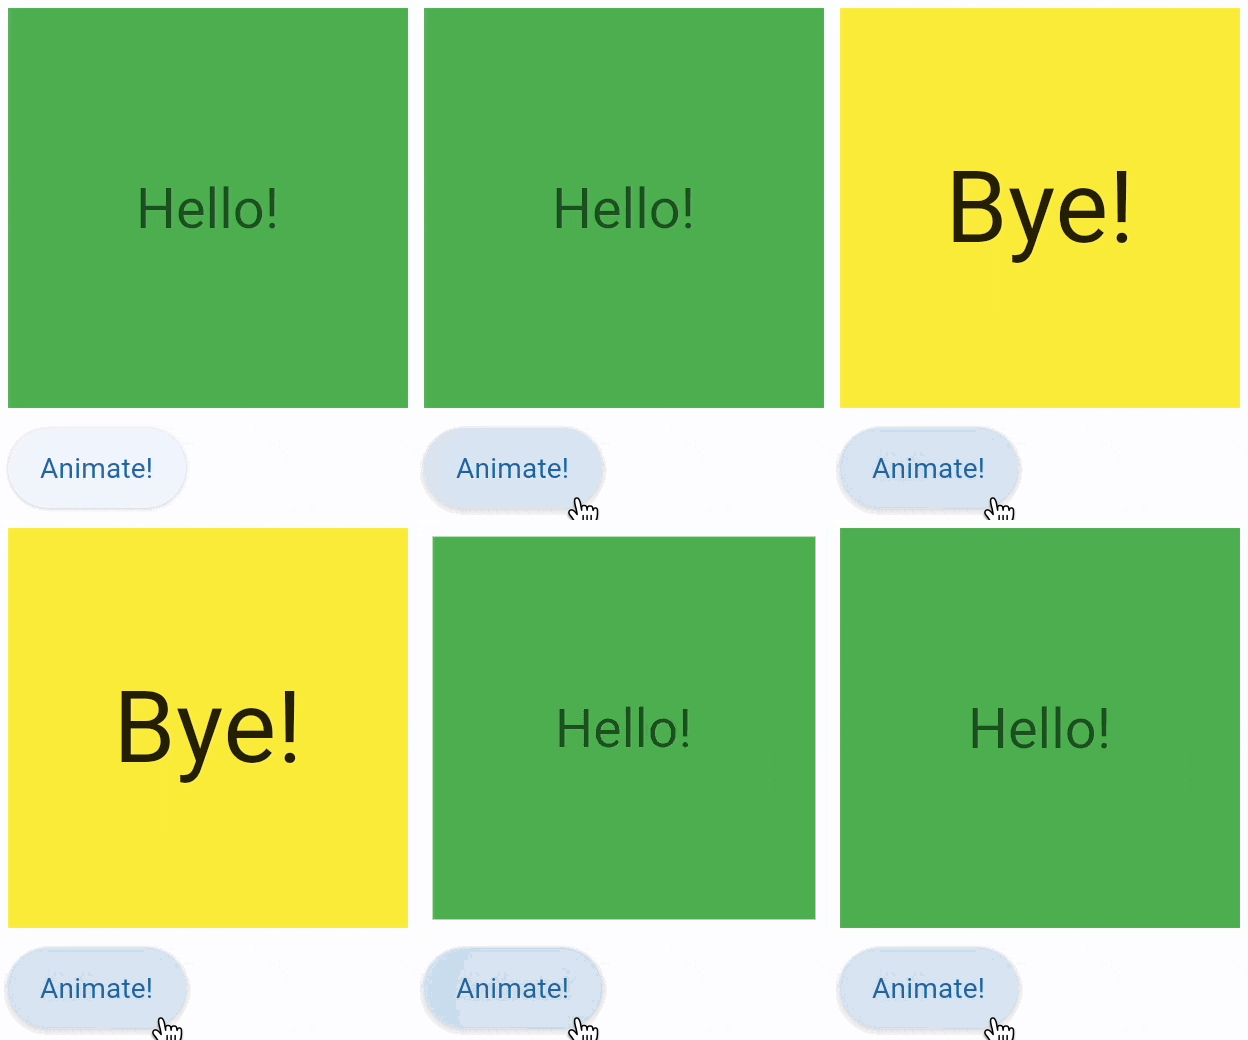
We are starting with "implicit" animations which allows you to animate a control property by setting a target value; whenever that target value changes, the control animates the property from the old value to the new one.

Demo timeโ€‹

Explore demo sources. The demo is hosted on Heroku, by the way, so you can use it as a starting point for your own deployments.

Implicit animationsโ€‹

Implicit animations can be enabled for the following control properties:

Additionally, all Container control properties can be now animated and there is a new AnimatedSwitcher control for animated transition between old a new content.

Other new featuresโ€‹

Markdown controlโ€‹

Allows to render text in Markdown format. Supports various extensions: CommonMark, GitHub Web and GitHub Flavored.

See Markdown control docs for more information and examples.

URL launcherโ€‹

page.launch_url(url) method allows programmatically opening a URL in a new browser window, for example:

page.launch_url("https://google.com")

It also works nice with Markdown control for opening links within markdown document.

Keyboard shortcutsโ€‹

Page now contains on_keyboard_event event handlet to globally intercept all keystrokes.

Check this simple usage example.

Accessibility improvementsโ€‹

We added Accessibility section to the docs covering semantics support for screen readers.

ShaderMark controlโ€‹

A control that applies a mask generated by a shader to its content. Allows making nice effects like gradually fading out images.

That's it!

Give Flet a try and let us know what you think!

Beautiful gradients, button styles and TextField rounded corners in a new Flet release

ยท 4 min read
Feodor Fitsner
Flet founder and developer

We've just released Flet 0.1.46 adding new exciting features:

  • Gradient backgrounds in Container
  • Extensive styling for buttons, TextField and Dropdown controls
  • ...and more

Gradient backgroundsโ€‹

Linear gradientโ€‹

import math
import flet as ft

def main(page: ft.Page):

page.add(
ft.Container(
alignment=ft.alignment.center,
gradient=ft.LinearGradient(
begin=ft.alignment.top_left,
end=Alignment(0.8, 1),
colors=[
"0xff1f005c",
"0xff5b0060",
"0xff870160",
"0xffac255e",
"0xffca485c",
"0xffe16b5c",
"0xfff39060",
"0xffffb56b",
],
tile_mode=ft.GradientTileMode.MIRROR,
rotation=math.pi / 3,
),
width=150,
height=150,
border_radius=5,
)
)

ft.app(target=main)

Check Container.gradient docs for more information about LinearGradient properties.

Radial gradientโ€‹

import flet as ft

def main(page: ft.Page):

page.add(
ft.Container(
alignment=ft.alignment.center,
gradient=ft.RadialGradient(
center=Alignment(0.7, -0.6),
radius=0.2,
colors=[
"0xFFFFFF00", # yellow sun
"0xFF0099FF", # blue sky
],
stops=[0.4, 1.0],
),
width=150,
height=150,
border_radius=5,
)
)

ft.app(target=main)

Check Container.gradient docs for more information about RadialGradient properties.

Sweep gradientโ€‹

import math
import flet as ft

def main(page: ft.Page):

page.add(
ft.Container(
alignment=ft.alignment.center,
gradient=SweepGradient(
center=ft.alignment.center,
start_angle=0.0,
end_angle=math.pi * 2,
colors=[
"0xFF4285F4",
"0xFF34A853",
"0xFFFBBC05",
"0xFFEA4335",
"0xFF4285F4",
],
stops=[0.0, 0.25, 0.5, 0.75, 1.0],
),
width=150,
height=150,
border_radius=5,
)
)

ft.app(target=main)

Check Container.gradient docs for more information about SweepGradient properties.

Buttons stylingโ€‹

This Flet release introduces style property to all button controls which is an instance of ButtonStyle class. ButtonStyle allows controling all visual aspects of a button, such as shape, foreground, background and shadow colors, content padding, border width and radius!

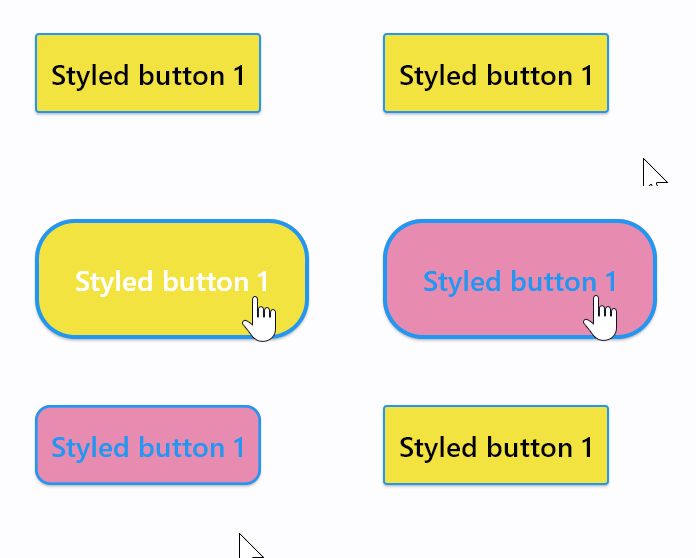
Moreover, each individual style attribute could be configured for a different "Material states" of a button, such as "hovered", "focused", "disabled" and others. For example, you can configure a different shape, background color for a hovered state and configure fallback values for all other states.

Check this "extreme" styling example:

import flet as ft
from flet.border import BorderSide
from flet.buttons import RoundedRectangleBorder

def main(page: ft.Page):

page.add(
ft.ElevatedButton(
"Styled button 1",
style=ft.ButtonStyle(
color={
ft.MaterialState.HOVERED: ft.colors.WHITE,
ft.MaterialState.FOCUSED: ft.colors.BLUE,
ft.MaterialState.DEFAULT: ft.colors.BLACK,
},
bgcolor={ft.MaterialState.FOCUSED: ft.colors.PINK_200, "": ft.colors.YELLOW},
padding={ft.MaterialState.HOVERED: 20},
overlay_color=ft.colors.TRANSPARENT,
elevation={"pressed": 0, "": 1},
animation_duration=500,
side={
ft.MaterialState.DEFAULT: BorderSide(1, ft.colors.BLUE),
ft.MaterialState.HOVERED: BorderSide(2, ft.colors.BLUE),
},
shape={
ft.MaterialState.HOVERED: RoundedRectangleBorder(radius=20),
ft.MaterialState.DEFAULT: RoundedRectangleBorder(radius=2),
},
),
)
)

ft.app(target=main)

ft.MaterialState.DEFAULT state is a fallback style.

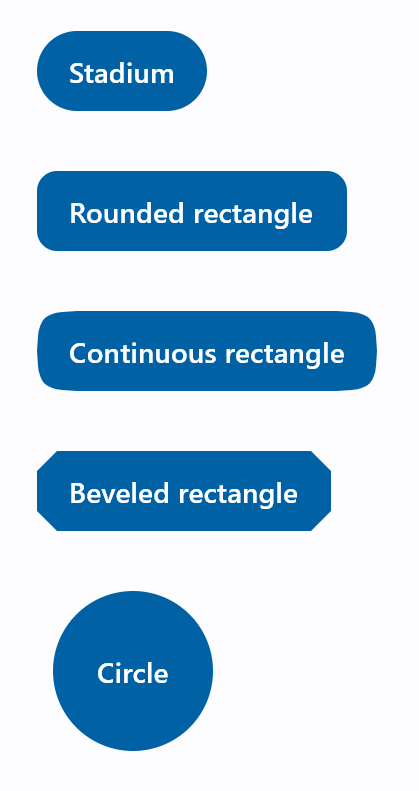
Button shape could also be changed with ButtonStyle.shape property:

import flet as ft
from flet.buttons import (
BeveledRectangleBorder,
CircleBorder,
ContinuousRectangleBorder,
RoundedRectangleBorder,
StadiumBorder,
)

def main(page: ft.Page):
page.padding = 30
page.spacing = 30
page.add(
ft.FilledButton(
"Stadium",
style=ft.ButtonStyle(
shape=ft.StadiumBorder(),
),
),
ft.FilledButton(
"Rounded rectangle",
style=ft.ButtonStyle(
shape=ft.RoundedRectangleBorder(radius=10),
),
),
ft.FilledButton(
"Continuous rectangle",
style=ft.ButtonStyle(
shape=ft.ContinuousRectangleBorder(radius=30),
),
),
ft.FilledButton(
"Beveled rectangle",
style=ft.ButtonStyle(
shape=ft.BeveledRectangleBorder(radius=10),
),
),
ft.FilledButton(
"Circle",
style=ft.ButtonStyle(shape=ft.CircleBorder(), padding=30),
),
)

ft.app(target=main)

Check ElevatedButton.style property docs for a complete description of ButtonStyle class and its properties.

TextField and Dropdown stylingโ€‹

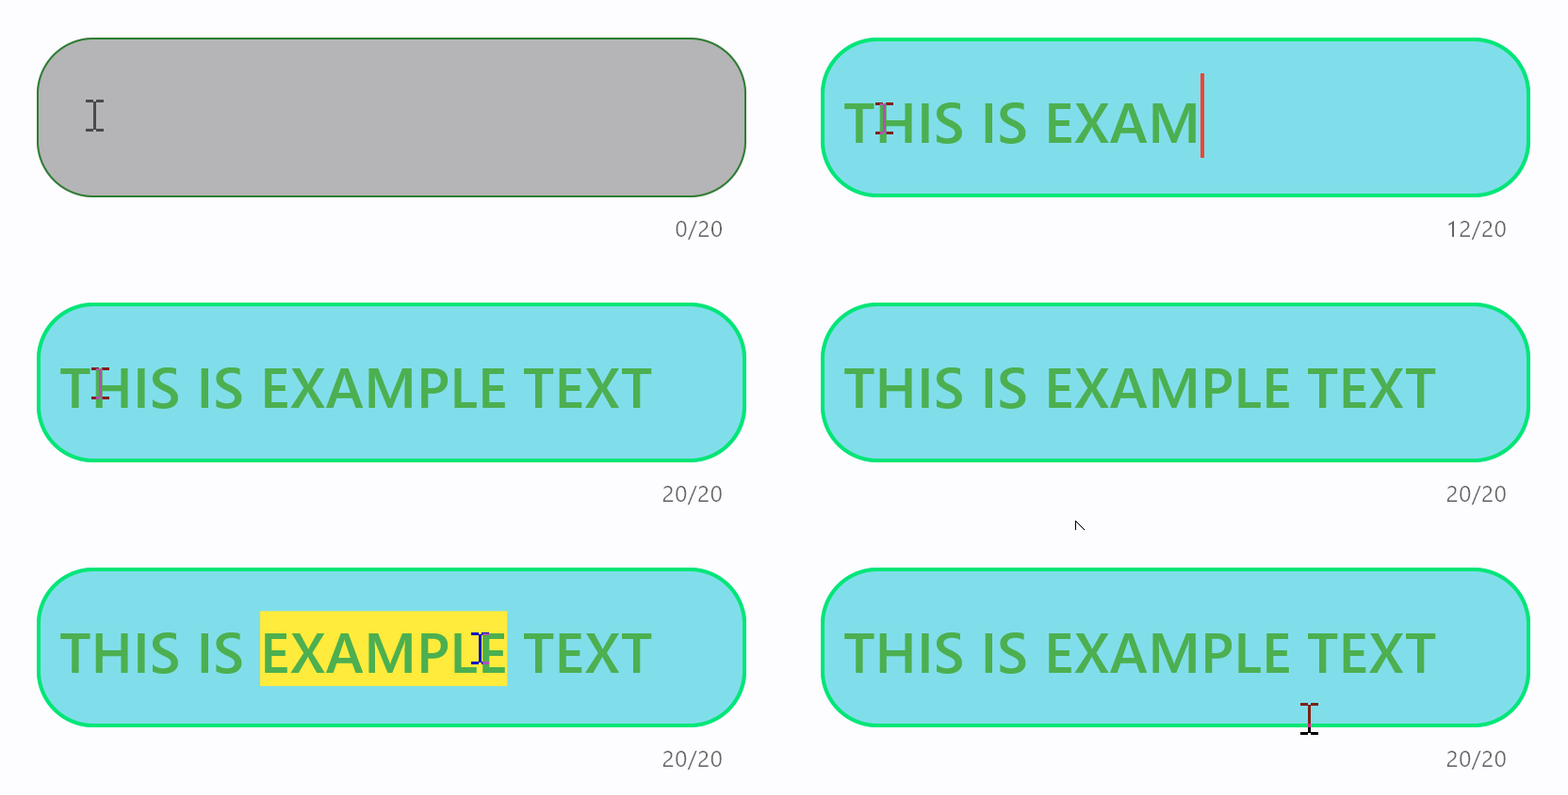
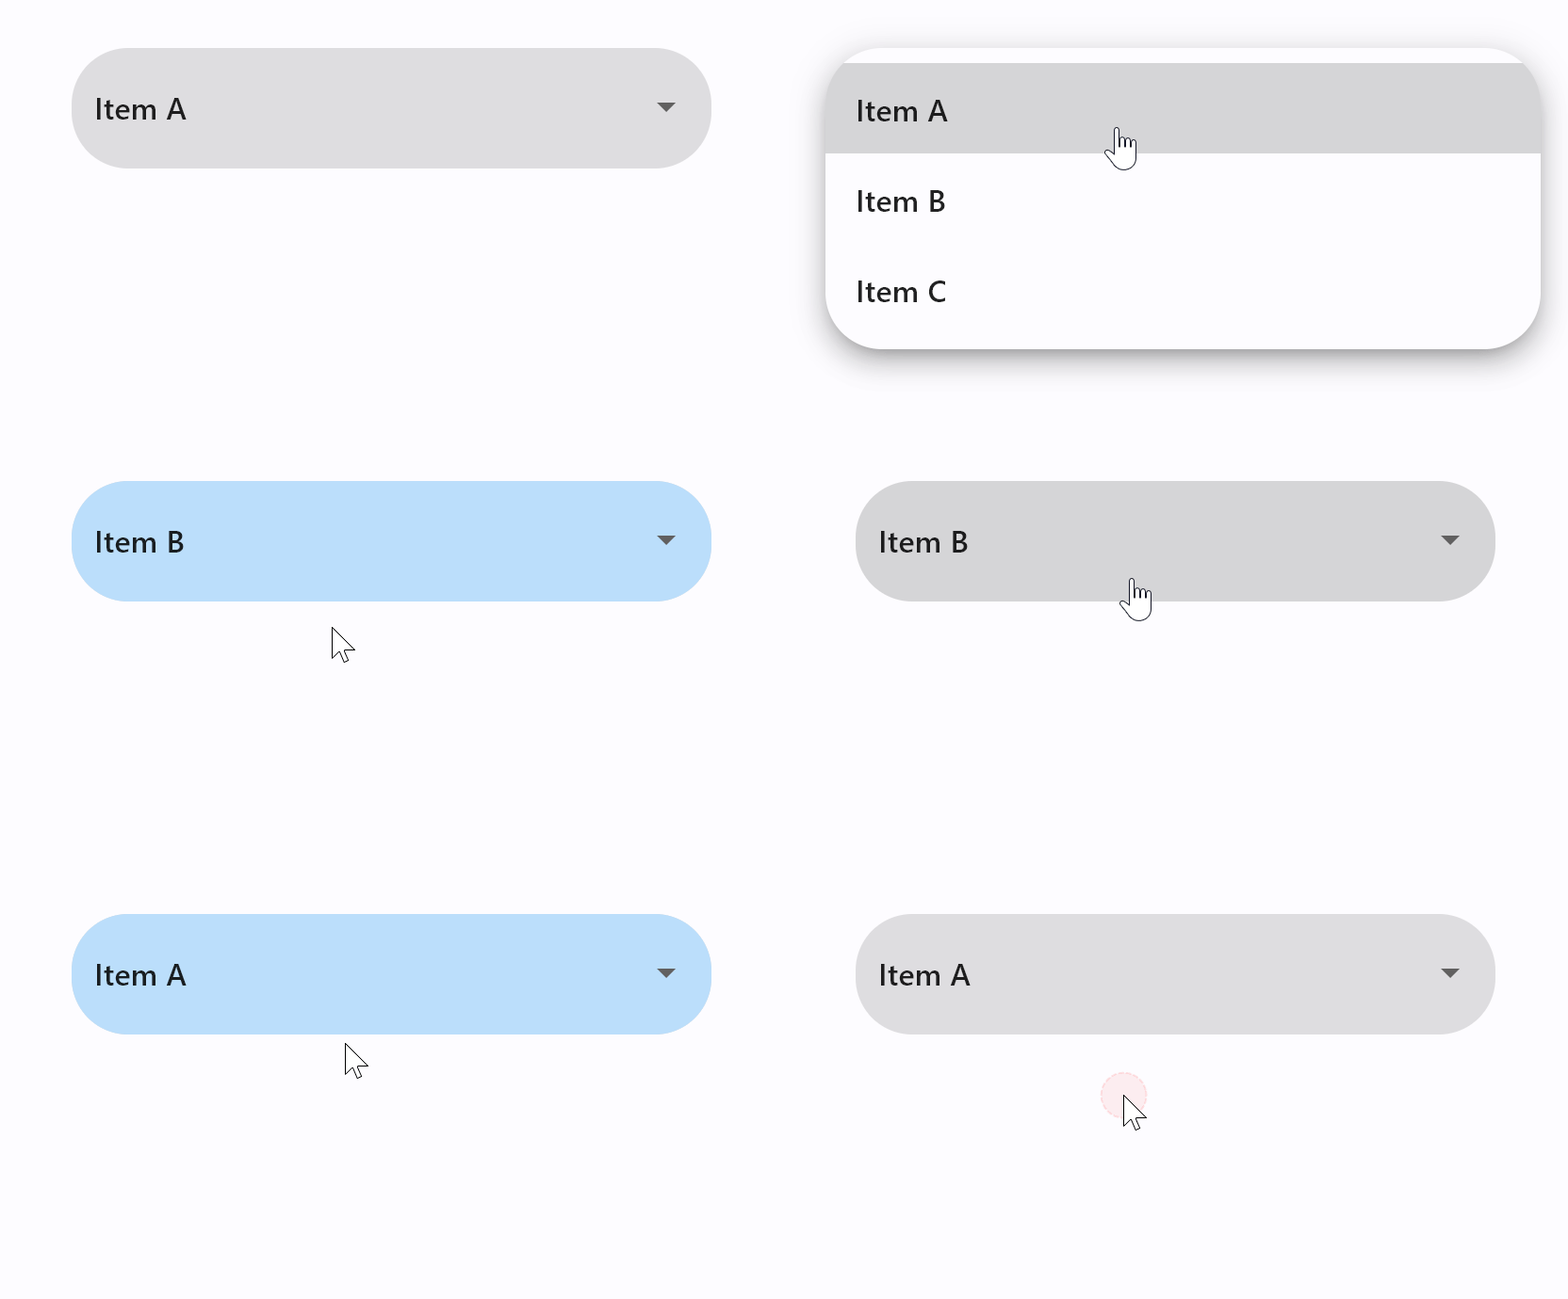
It is now possible to configure text size, border style and corners radius for normal and focused states of TextField and Dropdown controls. TextField also allows configuring colors for a cursor and selection.

Additionally, the maximum length of entered into TextField can now be limited with max_length property.

We also introduced capitalization property for automatic capitalization of characters as you type them into TextField. You can choose from 4 capitalization strategies: none (default), characters, words and sentences.

An example of styled TextField with max_length and capitalization:

import flet as ft

def main(page: ft.Page):
page.padding = 50
page.add(
ft.TextField(
text_size=30,
cursor_color=ft.colors.RED,
selection_color=ft.colors.YELLOW,
color=ft.colors.PINK,
bgcolor=ft.colors.BLACK26,
filled=True,
focused_color=ft.colors.GREEN,
focused_bgcolor=ft.colors.CYAN_200,
border_radius=30,
border_color=ft.colors.GREEN_800,
focused_border_color=ft.colors.GREEN_ACCENT_400,
max_length=20,
capitalization="characters",
)
)

ft.app(target=main)

An example of styled Dropdown control:

import flet as ft

def main(page: ft.Page):
page.padding = 50
page.add(
ft.Dropdown(
options=[
ft.dropdown.Option("a", "Item A"),
ft.dropdown.Option("b", "Item B"),
ft.dropdown.Option("c", "Item C"),
],
border_radius=30,
filled=True,
border_color=ft.colors.TRANSPARENT,
bgcolor=ft.colors.BLACK12,
focused_bgcolor=ft.colors.BLUE_100,
)
)

ft.app(target=main)

Other changesโ€‹

IconButton got selected state which plays nice with a new style.

This is an example of a toggle icon button:

import flet as ft

def main(page: ft.Page):

def toggle_icon_button(e):
e.control.selected = not e.control.selected
e.control.update()

page.add(
ft.IconButton(
icon=ft.icons.BATTERY_1_BAR,
selected_icon=ft.icons.BATTERY_FULL,
on_click=toggle_icon_button,
selected=False,
style=ft.ButtonStyle(color={"selected": ft.colors.GREEN, "": ft.colors.RED}),
)
)

ft.app(target=main)

Give Flet a try and let us know what you think!